
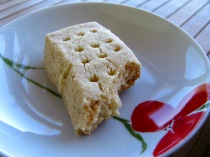
SHORTBREAD
After some tinkering, I finally made a shortbread that is worth baking at home. These are simple and lovely with tea and fresh fruit. My first shortbread was buttery and rich, but off. They were heavy little bricks. You
SHORTBREAD
After some tinkering, I finally made a shortbread that is worth baking at home. These are simple and lovely with tea and fresh fruit. My first shortbread was buttery and rich, but off. They were heavy little bricks. You

DRINKING TEA CAN TURN YOU INTO A POET
Last year, a company called Teavivre proposed to send me some teas to taste. With nothing to lose, of course I said yes. I tasted five different teas over the months: two black teas, one oolong, one green, and
DRINKING TEA CAN TURN YOU INTO A POET
Last year, a company called Teavivre proposed to send me some teas to taste. With nothing to lose, of course I said yes. I tasted five different teas over the months: two black teas, one oolong, one green, and

A TASTE OF SUMMER
In the classic tradition of highly sporadic posting, I’m back. A year has gone by since I last wrote. I’ve travelled to see my family. I’ve moved to a place I love but needs plenty of work. I’ve suffered atrocious
A TASTE OF SUMMER
In the classic tradition of highly sporadic posting, I’m back. A year has gone by since I last wrote. I’ve travelled to see my family. I’ve moved to a place I love but needs plenty of work. I’ve suffered atrocious
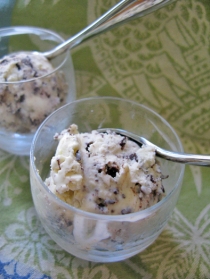
MINT MASCARPONE CHOCOLATE CHIP ICE CREAM
One of my all time top favorite ice creams: mint-chocolate chip!
MINT MASCARPONE CHOCOLATE CHIP ICE CREAM
One of my all time top favorite ice creams: mint-chocolate chip!

THE SHELLFISH OF BOUZIGUES
Perched on the terrace above an oyster farmer’s workshop, I was appreciating the view over the Etang de Thau…

PAVLOVA IS IN THE AIR
Me and meringue are not always on harmonious terms, kind of like me and dance.
PAVLOVA IS IN THE AIR
Me and meringue are not always on harmonious terms, kind of like me and dance.

SPRING BEET & CARROT CARPACCIO
The first weeks of spring have furnished me with an irresistible urge to clean things, air out, lighten up…
SPRING BEET & CARROT CARPACCIO
The first weeks of spring have furnished me with an irresistible urge to clean things, air out, lighten up…

INLAND TO COAST & JAMON IBERICO DE BELLOTA
One morning, we strolled through the coastal city of Vigo, on the western coast of Spain.
INLAND TO COAST & JAMON IBERICO DE BELLOTA
One morning, we strolled through the coastal city of Vigo, on the western coast of Spain.

EL PULPO GALLEGA & THE CHANTADA WINE FESTIVAL
Wine is first and foremost about people, places, and experiences.
EL PULPO GALLEGA & THE CHANTADA WINE FESTIVAL
Wine is first and foremost about people, places, and experiences.

MIRADORS, MONKFISH, & BBQ CHULETAS, OR MORE WANDERING & EATING IN GALICIA
The Ribeira Sacra’s specific landscape is perfect for spectacular lookout points, or miradors, and many are signaled from the road.
MIRADORS, MONKFISH, & BBQ CHULETAS, OR MORE WANDERING & EATING IN GALICIA
The Ribeira Sacra’s specific landscape is perfect for spectacular lookout points, or miradors, and many are signaled from the road.
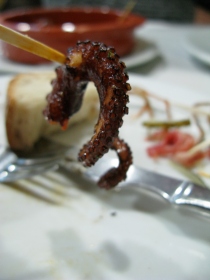
THE DIFFERENCE BETWEEN PULPO, CALAMAR, & CHIPIRONES, PLUS CHORIZO ON FIRE
The left wall was lined with booths, the right wall was paralleled by the bar and two steampunk copper beer casks.
THE DIFFERENCE BETWEEN PULPO, CALAMAR, & CHIPIRONES, PLUS CHORIZO ON FIRE
The left wall was lined with booths, the right wall was paralleled by the bar and two steampunk copper beer casks.
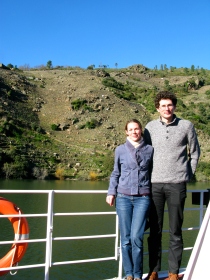
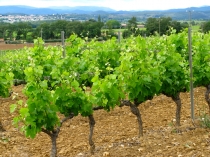
TAKE A STROLL ON THE RIO SIL
The calm northwest corner of Spain, Galicia, is known for its Celtic tradition, wines, and hearty cuisine, not to mention the sacred town that ends the ever popular pilgrimage of Santiago de Compostela.
TAKE A STROLL ON THE RIO SIL
The calm northwest corner of Spain, Galicia, is known for its Celtic tradition, wines, and hearty cuisine, not to mention the sacred town that ends the ever popular pilgrimage of Santiago de Compostela.

MARMALADE & Umm… WORLD VIEW
I love marmalade. Heart. Love. Mmmm.

ROASTED GARLIC & WHITE BEAN SOUP BLISS
In pastry school, my teacher once said that he could never understand why people would keep a recipe secret.
ROASTED GARLIC & WHITE BEAN SOUP BLISS
In pastry school, my teacher once said that he could never understand why people would keep a recipe secret.

EYE CANDY IN NARBONNE, FRANCE
Last year Bastien and I took a day trip to eat in a restaurant and walk around Narbonne, not far from here.
EYE CANDY IN NARBONNE, FRANCE
Last year Bastien and I took a day trip to eat in a restaurant and walk around Narbonne, not far from here.

A SPOONFUL OF HONEY
This post is just a little reminder to celebrate life and the things we love, and a miniscule tribute to someone who happened to love honey.
A SPOONFUL OF HONEY
This post is just a little reminder to celebrate life and the things we love, and a miniscule tribute to someone who happened to love honey.
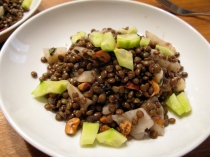
HOW I FELL IN LOVE WITH OTTOLENGHI TODAY
It just so happened that today I looked for a lentil salad recipe. Ingredients were sparse in the kitchen as we haven’t been shopping since returning from the holidays.
HOW I FELL IN LOVE WITH OTTOLENGHI TODAY
It just so happened that today I looked for a lentil salad recipe. Ingredients were sparse in the kitchen as we haven’t been shopping since returning from the holidays.
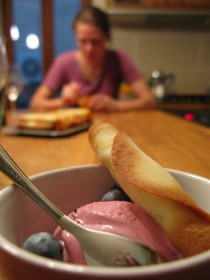
BLUEBERRIES AND CREAM
I finally broke down and bought an ice cream maker… A real turbine.
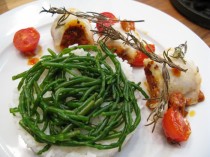
CHORIZO-ROLLED FISH FILETS
This is a delicious and simple recipe that you really can’t mess up. Great summer fare!
CHORIZO-ROLLED FISH FILETS
This is a delicious and simple recipe that you really can’t mess up. Great summer fare!

